How to Deploy a PHP Application with Database in a Minute?
Welcome to our guide on setting up a server with a database and deploying a PHP application. This step-by-step tutorial will help you configure your environment with ease.
Setting Up Your Environment
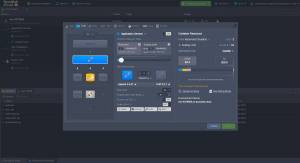
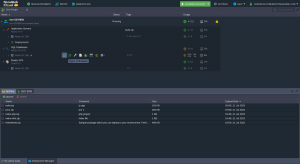
First, log into your Accuweb.cloud dashboard. If you haven't already set up a PHP environment with a database, click on the “Create New PHP Environment with Database” button
If you've already set up a PHP server and database and wish to access phpMyAdmin for the database, click on the SQL Database option and then on “Open in Browser.” This will redirect you to the phpMyAdmin page.
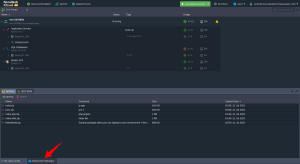
In the dashboard, you'll find the Deployment Manager. This tool helps you deploy your application using various methods. You can also find the option to access Web SSH by expanding the PHP server.
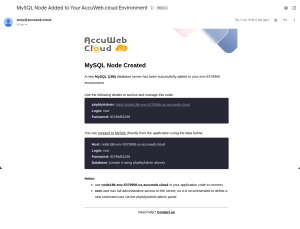
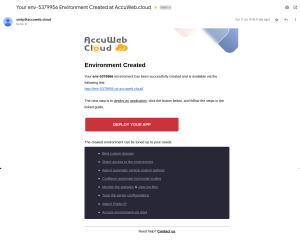
Check your email for your database and server credentials. You should have received an email containing this information, which you can use when deploying your application.
That's it! You have successfully set up a PHP server with a database and accessed it to deploy your application.
Connection to the Database
Once your project is successfully deployed, you need to connect it to your database. This requires your application to be properly configured, for example, using the MySQLi (MySQL Improved) extension.
Here are some basic functions to help you connect to your database:
1. Getting a Connection String
Use the following function to get a connection string for accessing your MySQL/MariaDB node:
1
|
mysqli_connect('{host}', '{user}', '{password}', '{db_name}');
|
Replace the placeholders with your connection data:
- {host} – link to your DB node without protocol part
- {user} and {password} – database admin credentials
- {db_name} – name of required database
2. Switching to a Different Database
To switch to a different database within the same server, use the following function:
1
|
mysql_select_db('{connect}','{db_name}');
|
Replace {connect} with the connection string obtained using the mysqli_connect function.
3. Closing a Connection
To close a connection to your database, execute the following:
Note: You need to specify the necessary functions in every *.php page, which should be connected to the database.
Checking the Connection
You can check the connection using the following code:
 1
 2
 3
 4
 5
 6
 7
 8
 9
10
11
|
<?php
$link = mysqli_connect('{host}', '{user}', '{password}', '{db_name}');
//if connection is not successful you will see text error
if (!$link) {
       die('Could not connect: ' . mysql_error());
}
//if connection is successfully you will see message below
echo 'Connected successfully';

mysqli_close($link);
?>
|
Replace {host}, {user}, {password}, and {db_name} in the connection string with the corresponding values
Executing a Simple Request
Here's an example of how to execute a simple request to your database and output it onto a table:
 1
 2
 3
 4
 5
 6
 7
 8
 9
10
11
12
13
14
15
16
17
18
19
20
21
22
23
24
25
26
27
|
<?php
// Connection checking:
$link = mysqli_connect('{host}', '{user}', '{password}', '{db_name}');
if (!$link)
{
echo "<h2>MySQL Error!</h2>";
exit;
}
// Switch to a different database:
$db="mysql";
mysqli_select_db($link, $db);
// table header output:
echo "<table border=\"1\" width=\"100%\" bgcolor=\"#FFFFE1\">";
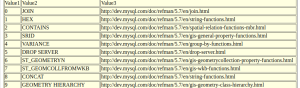
echo "<tr><td>Value1</td><td>Value2</td><td>Value3</td>";
// SQL-request:
$q = mysqli_query ($link, "SELECT * FROM help_topic;");
// table-result output
for ($c=0; $c<mysqli_num_rows($q); $c++)
{
echo "<tr>";
$f = mysqli_fetch_array($q); // Returns an array that corresponds to the fetched row and moves the internal data pointer ahead.
echo "<td>$f[0]</td><td>$f[1]</td><td>$f[5]</td>";
echo "</tr>";
}
echo "</table>";
?>
|
As a result, you’ll receive a kind of index for all available MySQL functions with links to the instructions on their using.
Conclusion:
Congratulations! You have successfully set up your PHP server and database and deployed your application using Accuweb.Cloud. We hope this guide has been helpful in simplifying the process for you. For more in-depth tutorials and best practices on PHP development, explore our Knowledgebase section.