
How to Install Drupal on Accuweb.Cloud in a Few Minutes?
Drupal stands as an open-source content management platform powering countless websites and applications. Functioning as a free software bundle, it facilitates effortless organization, administration, and publication of your content, accompanied by an infinite array of customization possibilities. A plethora of supplementary Drupal modules and templates are at your disposal, enabling the construction of virtually any site, from individual blogs to corporate-level applications.
The primary objective of Drupal is to offer a compact yet robust core that can be easily expanded through tailor-made modules. Emphasizing high-quality and well-documented code takes precedence over hastily implemented features.
It embraces well-established and emerging standards, prioritizing exceptional performance by employing efficient coding techniques, such as minimizing database queries. This CMS is committed to attaining a superior level of user-friendliness, catering to developers, administrators, and users' needs.
Deploying Drupal: A Step-by-Step Guide
If you still need to become an Accuweb Cloud user, you can seamlessly sign up and deploy the Drupal CMS.
Users who are already registered can install Drupal directly from the Marketplace within their dashboard.

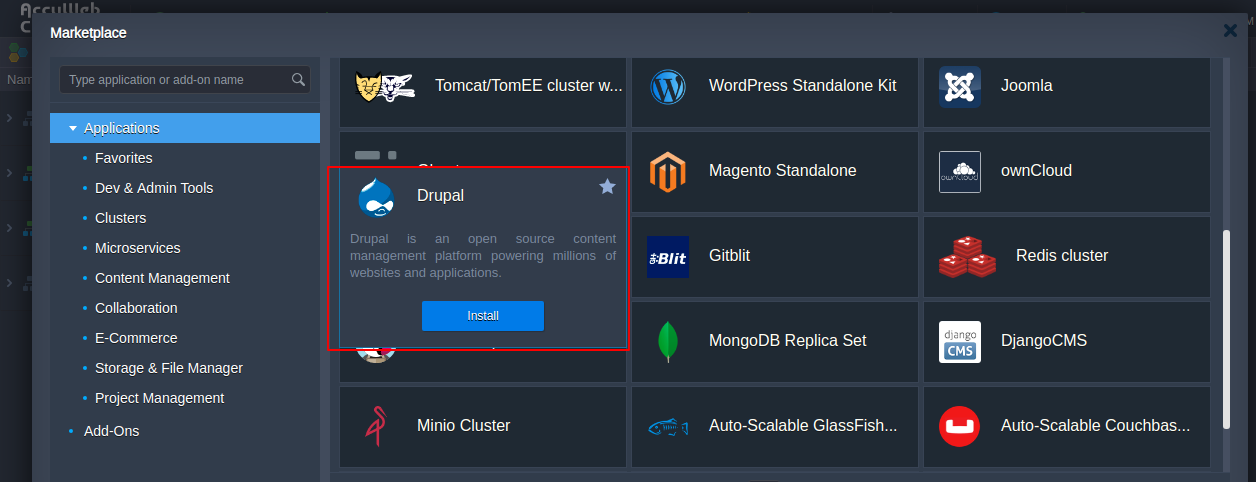
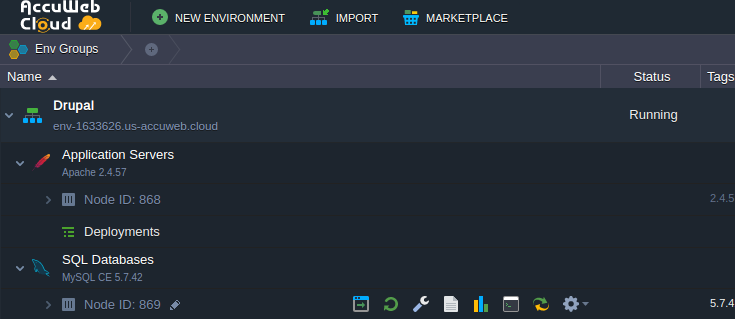
Consequently, a fresh environment containing an Apache PHP application server and a MySQL CE 5.7 database will be generated automatically, and an up-to-date version of the Drupal application.
The project resources are accessible within our GitHub JPS collection.
Manual Installation of Drupal
The following guide will walk you through the steps to launch your Drupal CMS application in the cloud.
Create an Environment
- Sign in to your account and tap the New Environment button in the top left corner.

2. In the displayed topology wizard, navigate to the PHP tab and opt for the necessary application server and database stacks (for instance, Apache PHP and MySQL 8).
Note: Please review the Drupal installation prerequisites before configuring your application topology. For instance, it is advisable to have PHP 7.2 or higher.
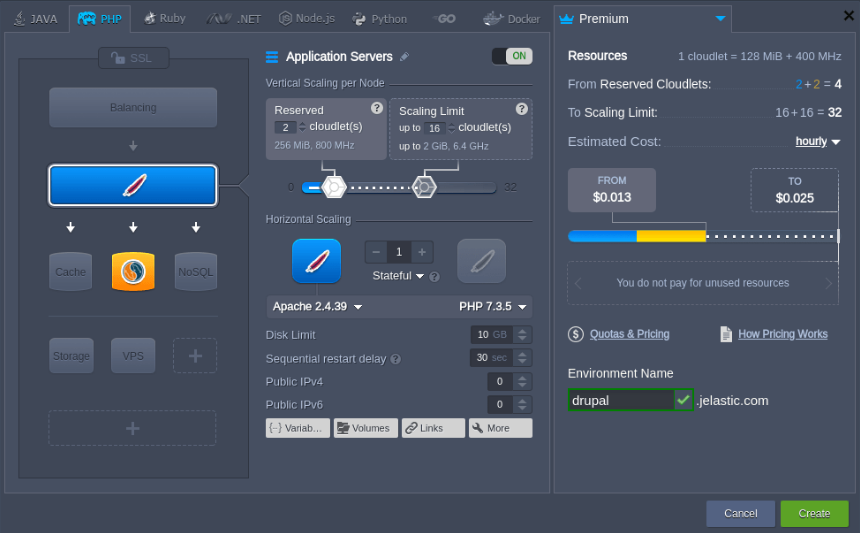
Configure other parameters according to your requirements (such as disk limits, public IPs, regions, etc.), and then proceed by clicking the Create button.
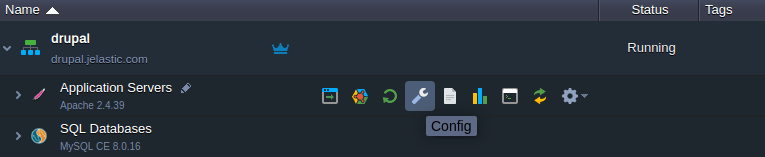
3. After creating your environment, click the Config button for the application server.
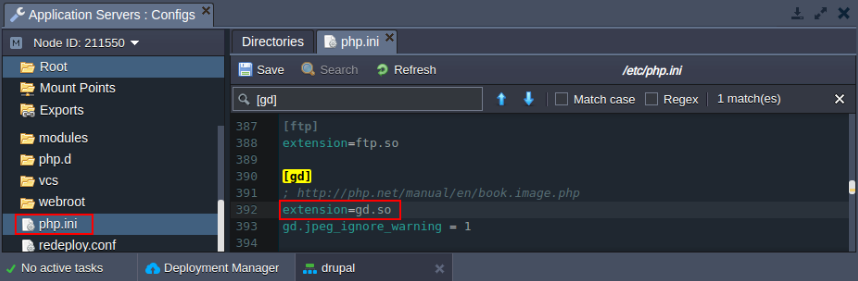
4. In the open configuration file manager, use the Favorites shortcut for php.ini to access and modify the file swiftly. You'll need to adjust various PHP modules to support the Drupal installation. Utilize the search function to locate the necessary extension promptly:
- To activate the extensions, remove the semicolons at the beginning of the lines for extension=gd.so and zend_extension=/usr/lib64/php/modules/opcache.so.
- Deactivate or comment out the mbstring.encoding_translation = On setting
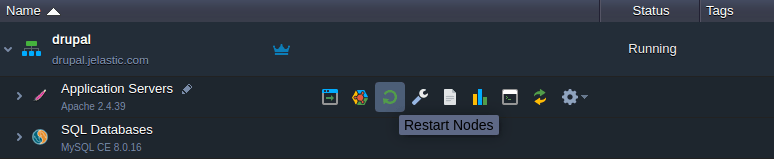
5. Remember to Save the changes and Restart Nodes for the Apache server to implement these changes.
Now, let's establish a separate database for your Drupal installation.
Set Up Database Configuration// Configure Database
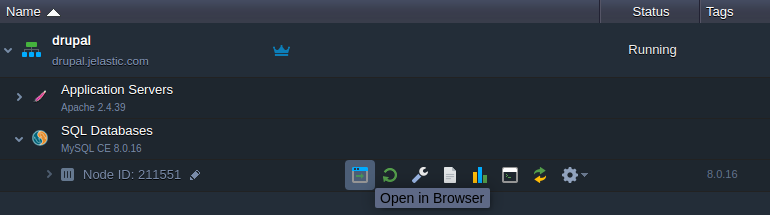
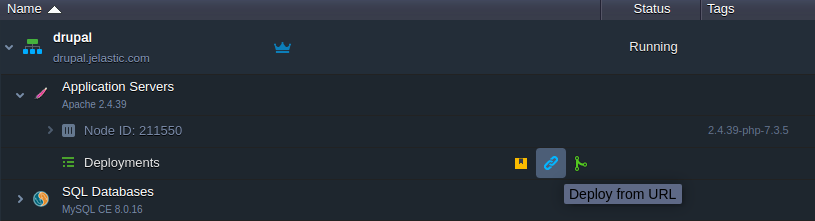
- Click on "Open in Browser" next to the database node (for example, MySQL).
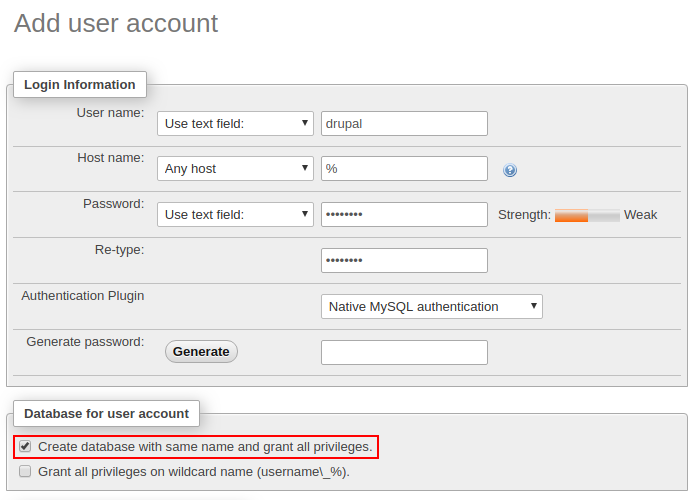
2. Sign in to the admin panel using the provided credentials from the relevant email. Navigate to the User Accounts section and select the Add user account link.
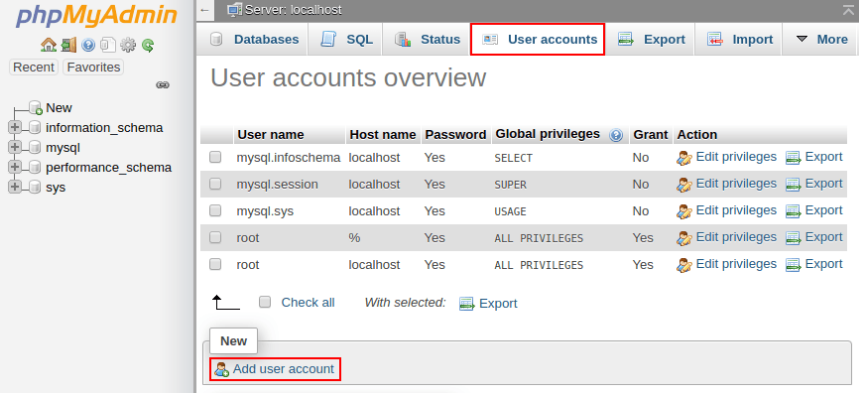
3. In the displayed form, enter the User name (e.g., drupal) and Password. Check the box "Create the database with the same name and grant all privileges," and then proceed by clicking the Go button located at the bottom.
Subsequently, go back to the dashboard to initiate the deployment of the Drupal package.
Deploy and Install Drupal
- Visit the official Drupal website to obtain the most recent version of the application package (.zip format) or deploy it directly using the provided link: https://www.drupal.org/download-latest/zi.p
- To automatically manage the necessary dependencies for your project, we will utilize the Composer tool (which comes pre-installed for both Apache and NGINX PHP servers) through the Post-deployment hook:
cd $WEBROOT/{project_name}
composer install
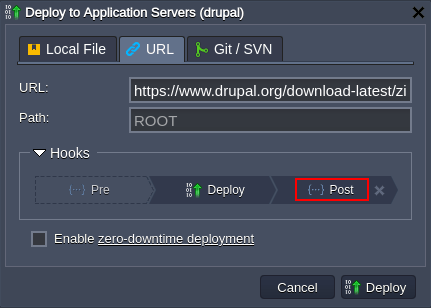
3. Here, substitute the {project_name} in the code with the appropriate context (Path) you have set for the project (ROOT by default).
4. Once the package has been deployed, access your application by clicking the "Open in Browser" option from the pop-up window or next to the application server node.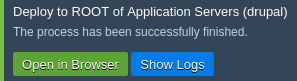
5. The installation process design is simple. In the initial two steps, you prompt to select an installation language and profile (e.g., English / Standard). Subsequently, an automatic verification requirement will be conducted.
6. Next, provide the details for the database connection:
Database Type - Select the suitable database option (MySQL/MariaDB, PostgreSQL, or SQLite).
Database Name, Database Username, Database Password - Input the credentials you employed during the database setup as detailed in the Configure Database section of this guide.
Advanced Options > Host - Enter the link to your database without the protocol part (you can find this in the relevant email).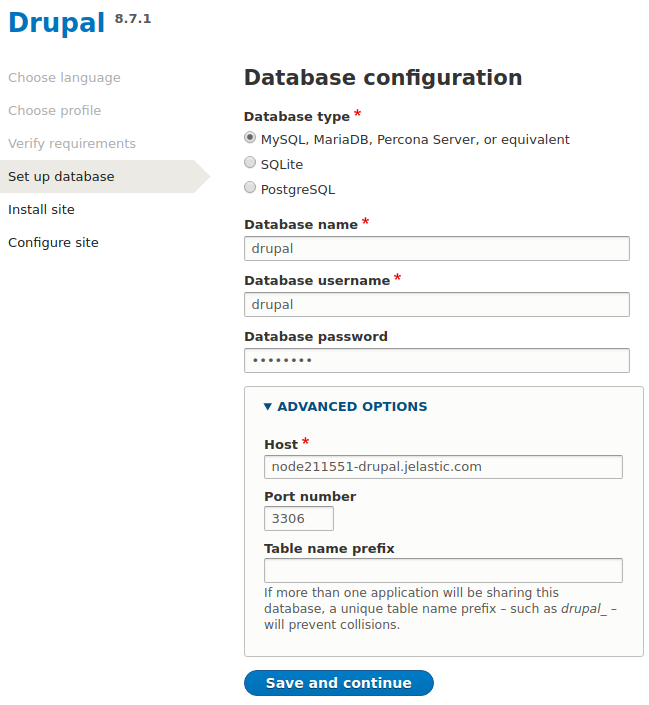
7. Click the "Save and Continue" button to proceed with the automatic installation of the Drupal CMS.
8. Complete the process by providing your site information (site name, email, admin login/password, etc.). After that, click "Save and Continue," it will direct you to the front page of your newly created site.

Drupal is an ideal choice for extensive enterprise projects with significant traffic. It offers seamless management of your entire website, encompassing content and image integration, product catalog updates, credit card payment processing, and even online reservation handling – all within the cloud.

Jilesh Patadiya, the visionary Founder and Chief Technology Officer (CTO) behind AccuWeb.Cloud. Founder & CTO at AccuWebHosting.com. He shares his web hosting insights on the AccuWeb.Cloud blog. He mostly writes on the latest web hosting trends, WordPress, storage technologies, and Windows and Linux hosting platforms.