How to Dockerize an Existing Node.js Application on Cloud?
We are thrilled to introduce you to a powerful and seamless solution that will revolutionize how you deploy, manage, and scale your existing node.js applications on a cloud platform.
Whether you are a professional developer or just starting your journey with Node.js, our platform is designed to cater to all levels of expertise. Say goodbye to tedious and time-consuming setups, as we offer a streamlined application deployment process, enabling you to get your ideas off the ground quickly.
With our robust cloud infrastructure, you can rest assured that your existing node.js application will enjoy unparalleled performance, scalability, and security.
Step 1, Create a new environment with the following configurations.
- Click on the Create New Environment Button
- Select Node.js version 16.20.1.
- Select DB, SQL -> MySQL version 8.0.33
- Reserved cloudlets 4, scaling limit 6
Keep all other settings as they are, and click on the create button at the bottom right side, wait for the environment to be created.
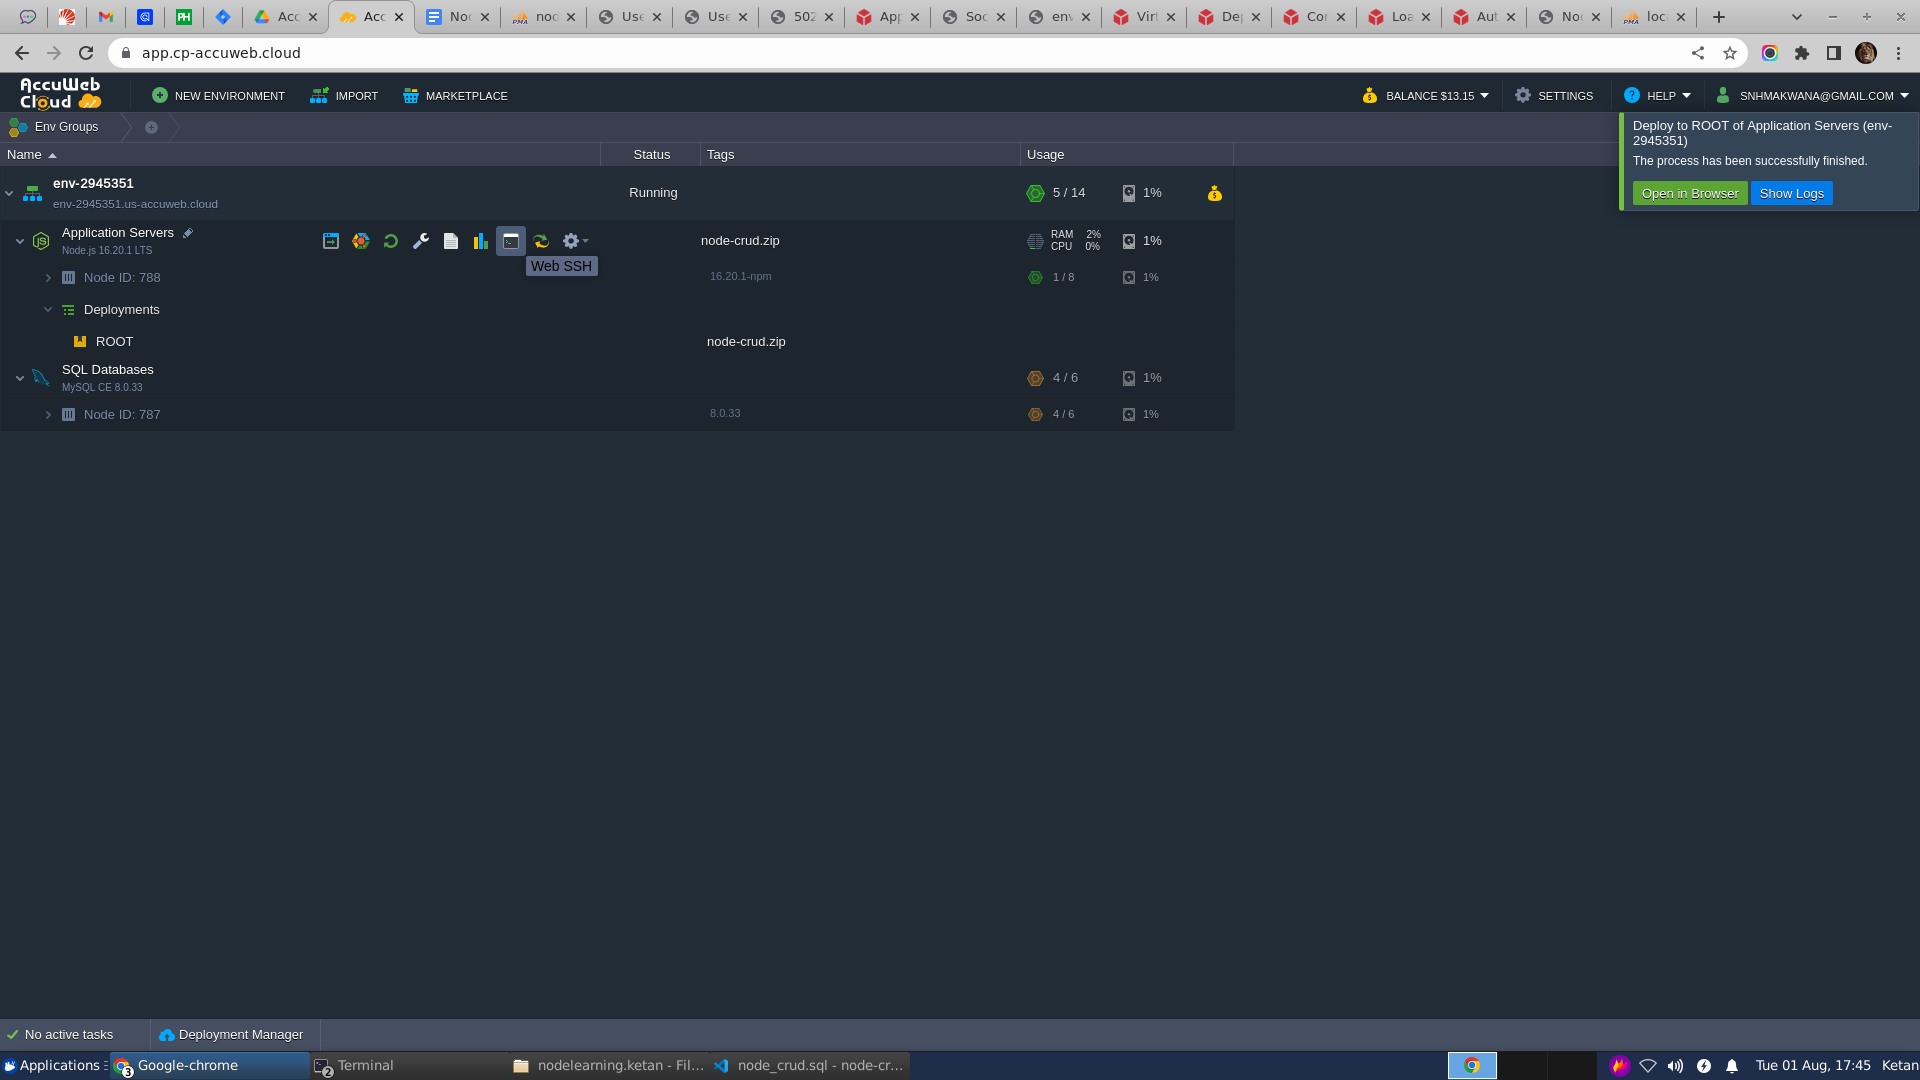
- Step 2, Deploying the project
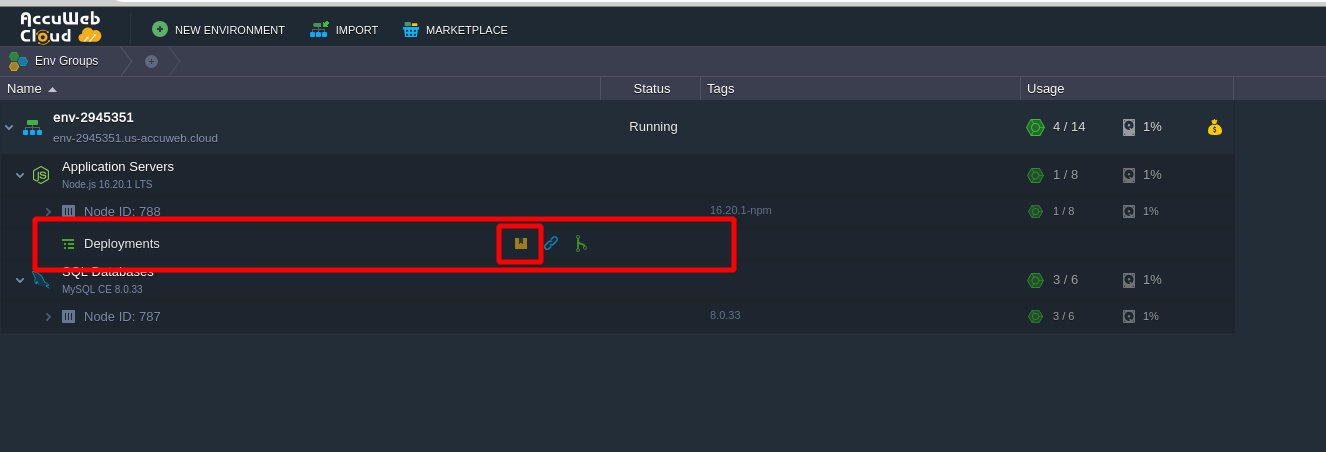
- Click on the button highlighted in the screenshot.
- Browse your project folder (in compressed format).
- To deploy the project, click the Deploy button at the bottom right corner. Please be patient; the deployment process may take some time to complete.
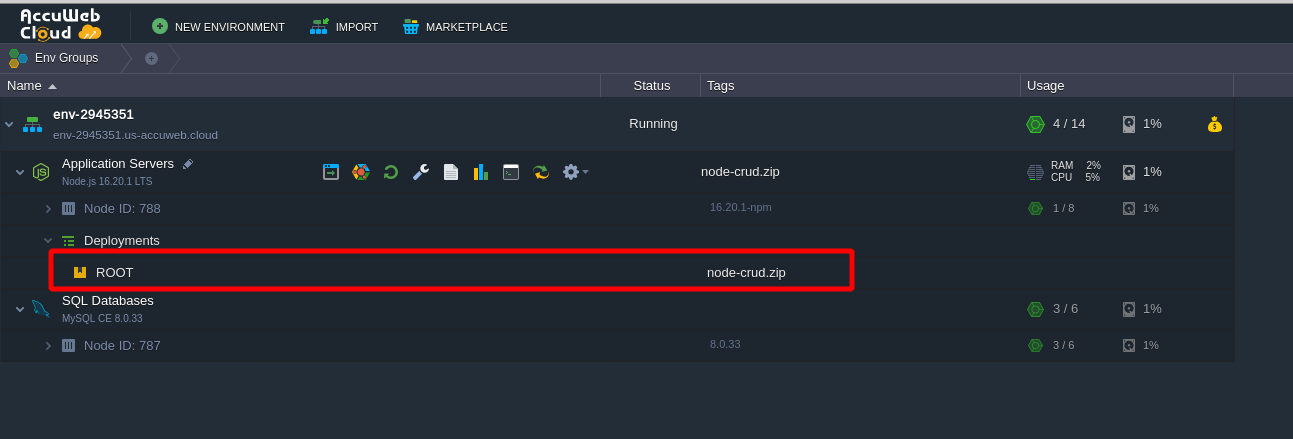
- Once the deployment is finished, you will see the folder ROOT created inside the deployment section.
Step 3, Update the DB credentials.
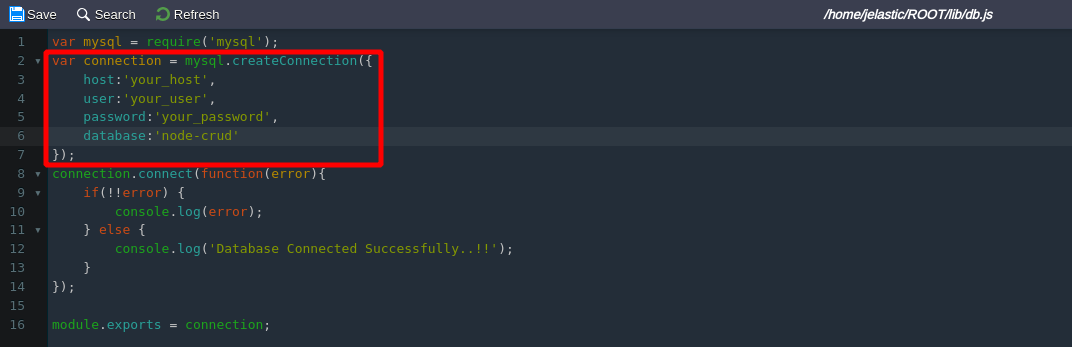
- Open/Edit your database configuration file and make the necessary changes.
- To open the file, click on the icon below SS.
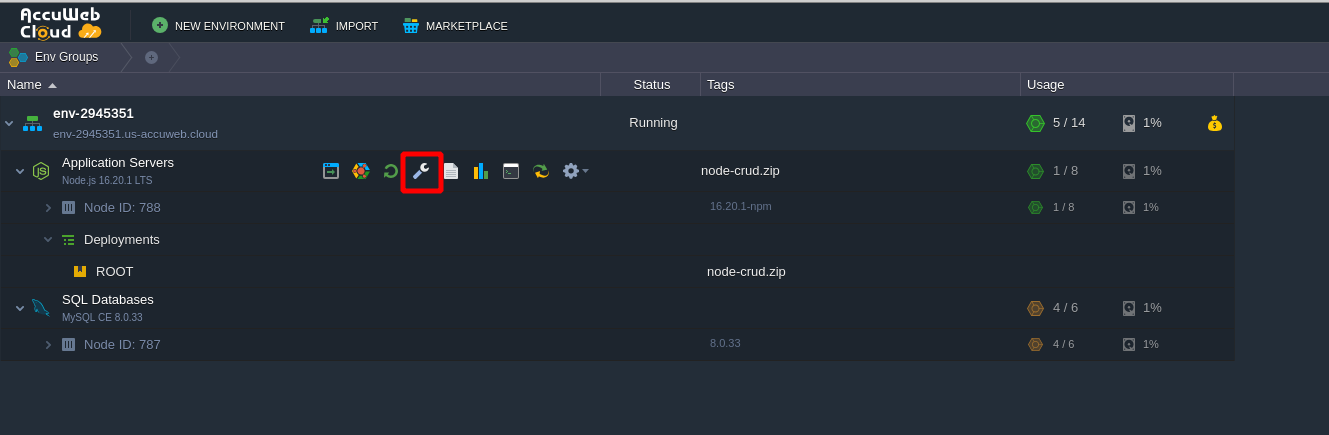
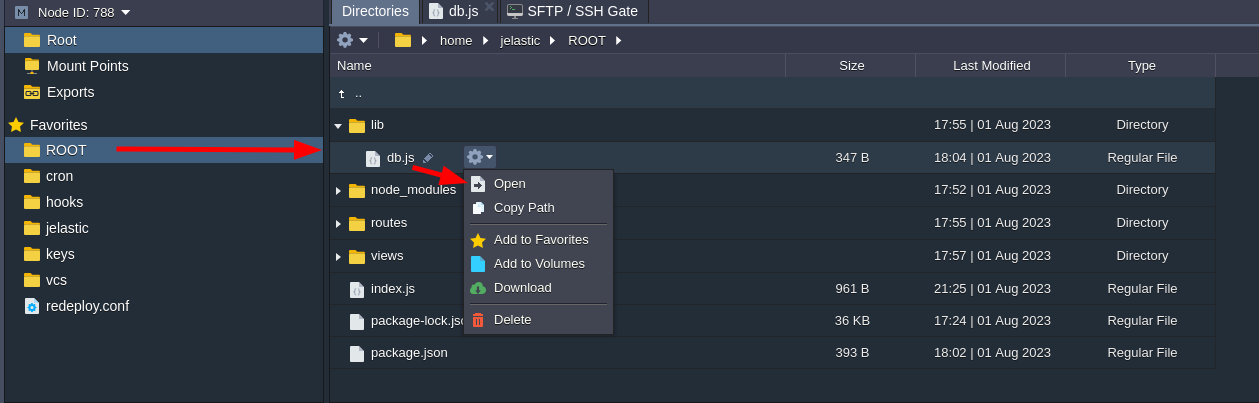
- It will open files for configurations, and from there, select the ROOT folder under the favorites folder; it will load all the files in the ROOT.
- Then, simply open your database configuration file and do needful changes (e.g.: db.js)
- Replace your_host with your actual host, your_user with your actual user name, and your_password with the existing password.
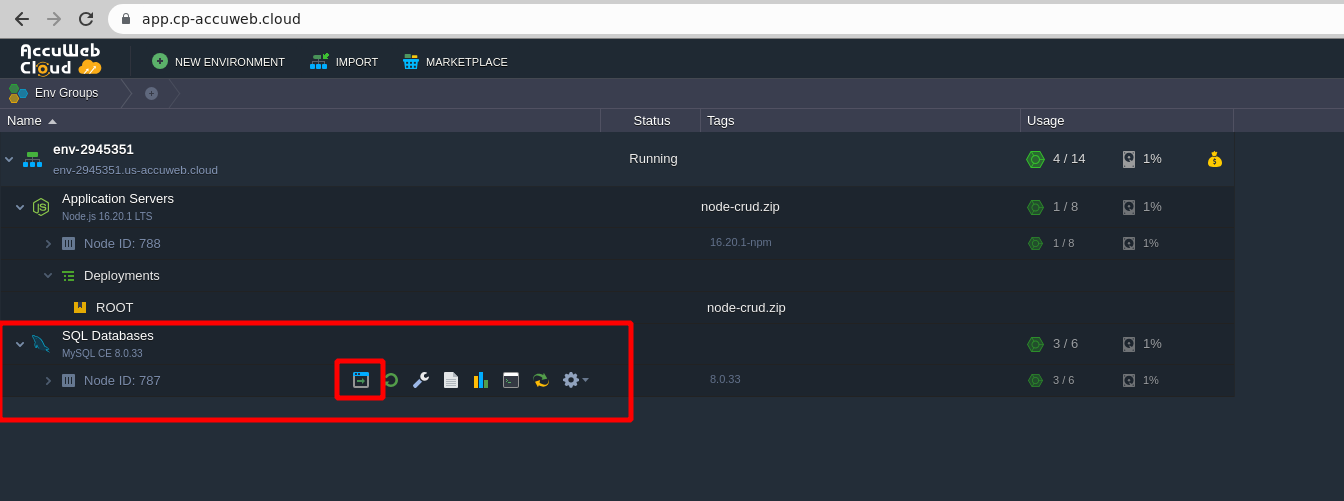
Step 4, Now it’s time to set up the database.
- Simply click on the button highlighted in the below SS, and it will redirect you to the phpMyAdmin panel.
- Once you redirect to the phpMyAdmin panel, you will see the login form to log into the database using your username and password.
- Note: You can obtain the username and password from the email received from AccuWeb.cloud while creating the environment.
- Create a new database and just simply import all your records into it.
The Database Setup is Complete!!!
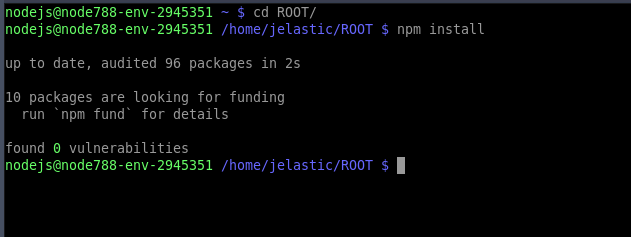
Step 5, Finally, time to run the project.
- Open the Terminal/ Web SSH.
- Run the following commands in terminal
-
- cd ROOT/
- npm install
-
- Finally, run the command node index.js.

- You’ll see two messages indicating that the application is working perfectly!
Hooray! We’ve Done it.

Jilesh Patadiya, the visionary Founder and Chief Technology Officer (CTO) behind AccuWeb.Cloud. Founder & CTO at AccuWebHosting.com. He shares his web hosting insights on the AccuWeb.Cloud blog. He mostly writes on the latest web hosting trends, WordPress, storage technologies, and Windows and Linux hosting platforms.